[Android] Navigation drawer 사용하기
Android Studio 에서 New project 생성하여 Drawer 샘플로 생성을 하면, 기본 Drawer 사용법을 확인 할 수 있다.
Drawer 하나 추가하기 위해서 해야할 작업이 뭐이리 많은 것인지 -_- Flutter가 그립다.
예제코드를 보면, Drawer 에 고정된 3개의 Fragment를 선언해놓고, navigation을 통해서 전환하는 방식을 사용했다.
하지만 내가 진행할 프로젝트에서는 Drawer에 있는 항목은 앱 진입 시 서버에서 가져온 카테고리들을 동적으로 보여주고, 선택시마다 해당 카테고리에 내용들을 변경해서 보여주는 방식이었다.
때문에 Drawer를 navigation과 연동할 필요는 없었기 때문에 Drawer를 추가하는 방법에 대해서만 작성하려고 한다.
1. activity_main.xml 의 Main layout을 androidx.drawerlayout.widget.DrawerLayout로 감싸고, NavigationView를 추가한다.
<?xml version="1.0" encoding="utf-8"?>
<androidx.drawerlayout.widget.DrawerLayout xmlns:android="http://schemas.android.com/apk/res/android"
xmlns:app="http://schemas.android.com/apk/res-auto"
xmlns:tools="http://schemas.android.com/tools"
android:id="@+id/drawer_layout"
android:layout_width="match_parent"
android:layout_height="match_parent"
android:fitsSystemWindows="true"
tools:openDrawer="start">
<include
layout="@layout/app_bar_main"
android:layout_width="match_parent"
android:layout_height="match_parent" />
<com.google.android.material.navigation.NavigationView
android:id="@+id/nav_view"
android:layout_width="wrap_content"
android:layout_height="match_parent"
android:layout_gravity="start"
android:fitsSystemWindows="true"
app:headerLayout="@layout/nav_header_main"
app:menu="@menu/activity_main_drawer" />
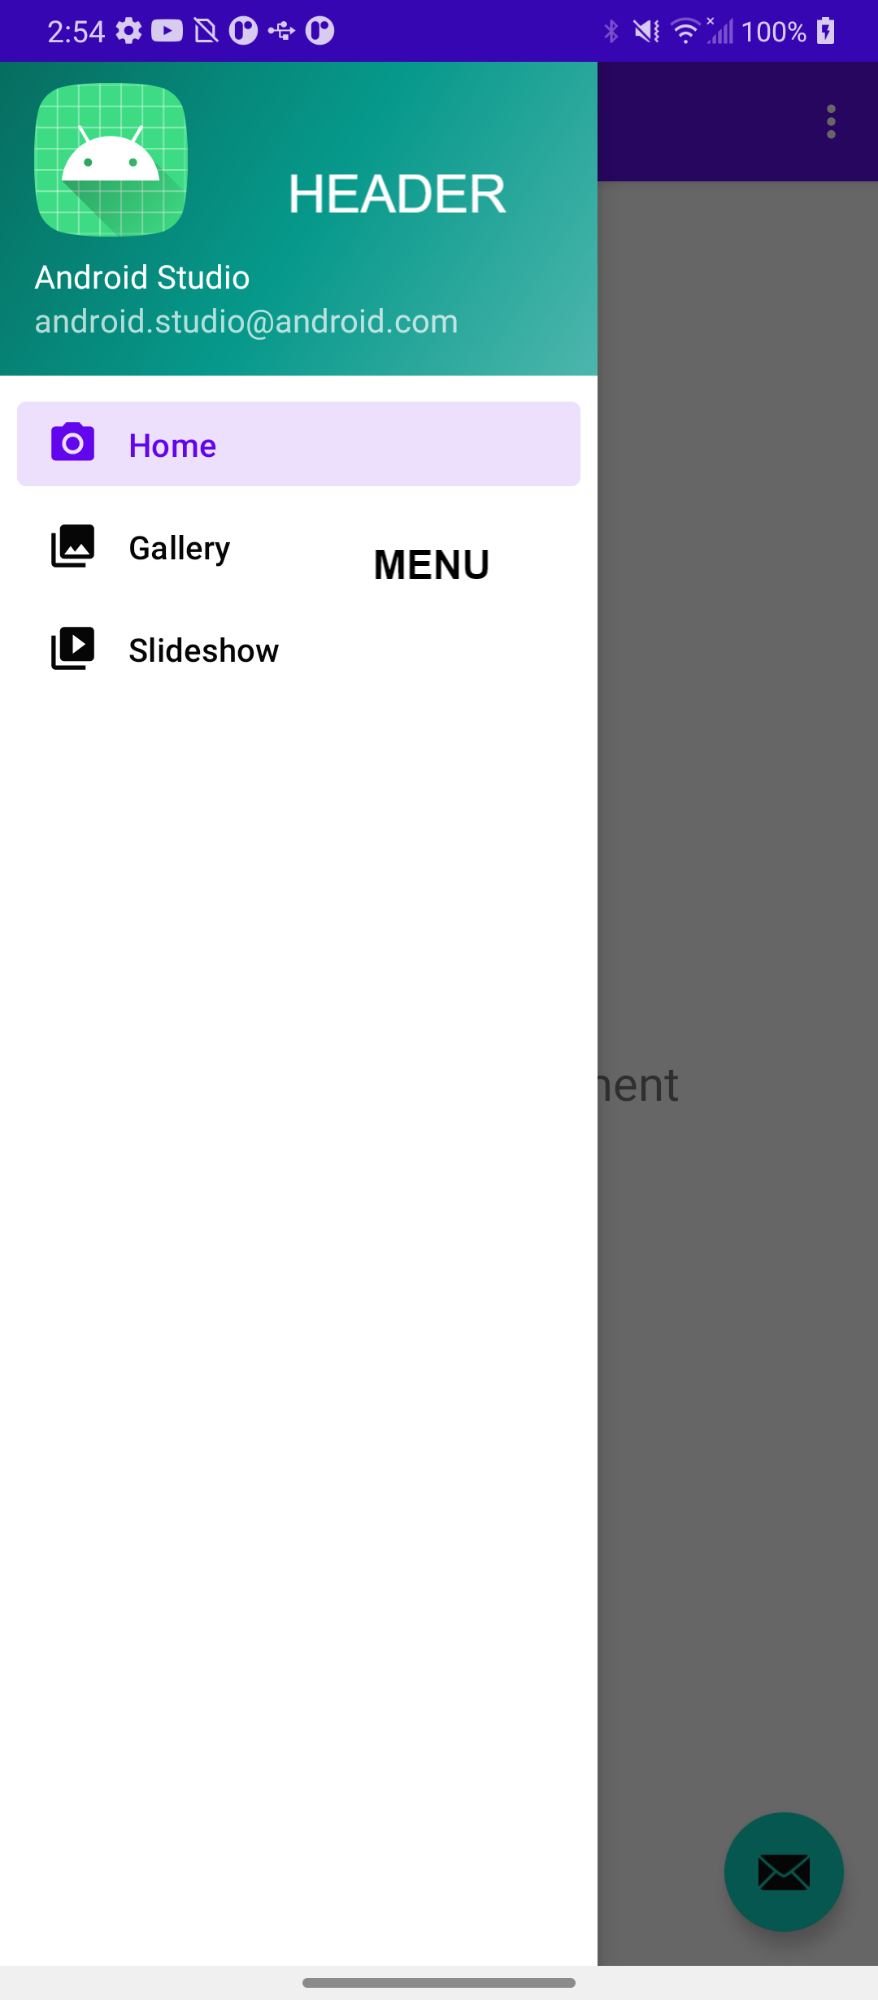
</androidx.drawerlayout.widget.DrawerLayout>여기서 appapp:headerLayout="@layout/nav_header_main" 는 drawer가 열렸을 때, 상단에 나타나는 HeaderView를 나타내고, app:menu="@menu/activity_main_drawer" 는 header밑에 나타나는 실제 메뉴리스트를 말한다.
nav_header_main.xml
<?xml version="1.0" encoding="utf-8"?>
<LinearLayout xmlns:android="http://schemas.android.com/apk/res/android"
    xmlns:app="http://schemas.android.com/apk/res-auto"
    android:layout_width="match_parent"
    android:layout_height="@dimen/nav_header_height"
    android:background="@drawable/side_nav_bar"
    android:gravity="bottom"
    android:orientation="vertical"
    android:paddingLeft="@dimen/activity_horizontal_margin"
    android:paddingTop="@dimen/activity_vertical_margin"
    android:paddingRight="@dimen/activity_horizontal_margin"
    android:paddingBottom="@dimen/activity_vertical_margin"
    android:theme="@style/ThemeOverlay.AppCompat.Dark">

    <ImageView
        android:id="@+id/imageView"
        android:layout_width="wrap_content"
        android:layout_height="wrap_content"
        android:contentDescription="@string/nav_header_desc"
        android:paddingTop="@dimen/nav_header_vertical_spacing"
        app:srcCompat="@mipmap/ic_launcher_round" />

    <TextView
        android:layout_width="match_parent"
        android:layout_height="wrap_content"
        android:paddingTop="@dimen/nav_header_vertical_spacing"
        android:text="@string/nav_header_title"
        android:textAppearance="@style/TextAppearance.AppCompat.Body1" />

    <TextView
        android:id="@+id/textView"
        android:layout_width="wrap_content"
        android:layout_height="wrap_content"
        android:text="@string/nav_header_subtitle" />
</LinearLayout>
activity_main_drawer.xml
<?xml version="1.0" encoding="utf-8"?>
<menu xmlns:android="http://schemas.android.com/apk/res/android"
    xmlns:tools="http://schemas.android.com/tools"
    tools:showIn="navigation_view">

    <group android:checkableBehavior="single">
        <item
            android:id="@+id/nav_home"
            android:icon="@drawable/ic_menu_camera"
            android:title="@string/menu_home" />
        <item
            android:id="@+id/nav_gallery"
            android:icon="@drawable/ic_menu_gallery"
            android:title="@string/menu_gallery" />
        <item
            android:id="@+id/nav_slideshow"
            android:icon="@drawable/ic_menu_slideshow"
            android:title="@string/menu_slideshow" />
    </group>
</menu>
NavigationView의 menu 태그에 activity_main_drawer.xml 을 연결시켰기 때문에, 기본적으로 3개의 메뉴가 나타나게 된다.
2. app_bar_main.xml 의 AppBarLayout 내에 ToolBar를 추가한다.
<?xml version="1.0" encoding="utf-8"?>
<androidx.coordinatorlayout.widget.CoordinatorLayout xmlns:android="http://schemas.android.com/apk/res/android"
    xmlns:app="http://schemas.android.com/apk/res-auto"
    xmlns:tools="http://schemas.android.com/tools"
    android:layout_width="match_parent"
    android:layout_height="match_parent"
    tools:context=".MainActivity">

    <com.google.android.material.appbar.AppBarLayout
        android:layout_width="match_parent"
        android:layout_height="wrap_content"
        android:theme="@style/Theme.DrawerExample.AppBarOverlay">

        <androidx.appcompat.widget.Toolbar
            android:id="@+id/toolbar"
            android:layout_width="match_parent"
            android:layout_height="?attr/actionBarSize"
            android:background="?attr/colorPrimary"
            app:popupTheme="@style/Theme.DrawerExample.PopupOverlay" />

    </com.google.android.material.appbar.AppBarLayout>


    <com.google.android.material.floatingactionbutton.FloatingActionButton
        android:id="@+id/fab"
        android:layout_width="wrap_content"
        android:layout_height="wrap_content"
        android:layout_gravity="bottom|end"
        android:layout_margin="@dimen/fab_margin"
        app:srcCompat="@android:drawable/ic_dialog_email" />

</androidx.coordinatorlayout.widget.CoordinatorLayout>
ToolBar는 App bar title 좌측에, Drawer를 열고 닫을 수 있는 버튼을 달기 위해서 필요하다.
3. 다음으로 MainActivity 코드를 작성한다.
    override fun onCreate(savedInstanceState: Bundle?) {
        super.onCreate(savedInstanceState)
        setContentView(R.layout.activity_main)
        val toolbar: Toolbar = findViewById(R.id.toolbar)
        // ToolBar를 ActionBar로 지정하는 작업
        setSupportActionBar(toolbar)

        val fab: FloatingActionButton = findViewById(R.id.fab)
        fab.setOnClickListener { view ->
            Snackbar.make(view, "Replace with your own action", Snackbar.LENGTH_LONG)
                    .setAction("Action", null).show()
        }

        val drawerLayout: DrawerLayout = findViewById(R.id.drawer_layout)
        val navView: NavigationView = findViewById(R.id.nav_view)

        val toggle = ActionBarDrawerToggle(this, drawerLayout, toolbar, R.string.nav_app_bar_open_drawer_description, R.string.navigation_drawer_close)
        drawerLayout.addDrawerListener(object : DrawerLayout.DrawerListener {
            override fun onDrawerSlide(drawerView: View, slideOffset: Float) {
            }

            override fun onDrawerOpened(drawerView: View) {
            }

            override fun onDrawerClosed(drawerView: View) {
            }

            override fun onDrawerStateChanged(newState: Int) {
            }
        })
        toggle.syncState()
        navView.setNavigationItemSelectedListener(this)
    }
Navigation 연동하는 부분을 제거했고, ActionBarDrawerToggle 객체를 하나 생성하여 DrawerLayout과 연결시켜주었다.
이렇게 하면 App bar 옆에 menu 버튼이 생기고, 눌렀을 때 Drawer가 열리게 된다.
4. Click listener달기
Drawer 내의 item을 선택할때마다 이벤트 핸들링을 하기 위해서 Activity에 NavigationView.OnNavigationItemSelectedLister를 implement 한다.
class MainActivity : AppCompatActivity(), NavigationView.OnNavigationItemSelectedListener {
...
    override fun onNavigationItemSelected(item: MenuItem): Boolean {
		...
        return true
    }

}
5. Drawer에 동적으로 메뉴 추가하기
NavigationView에서 menu를 얻어온다음에, Text를 add 시켜주면, 동적으로 메뉴를 추가할 수 있다.
                val menu = navView.menu
                for ((index, value) in mCategorizedChannelInfo.keys.withIndex()) {
                    menu.add(value)
                }